Affordable Diode Laser Engraver: Complete 2026 Buyer’s Guide
If you’re searching for an affordable diode laser engraver in 2026, you’re entering a market that has matured dramatically. Five years ago, a decent diode laser cost over $1,000 and required significant tinkering. Today, you can get a capable machine for under $300 that produces professional-grade results on wood, leather, and acrylic. This guide covers everything you need to know — from the physics of how these lasers work to the exact decision framework for choosing your first machine.
What Is an Affordable Diode Laser Engraver?
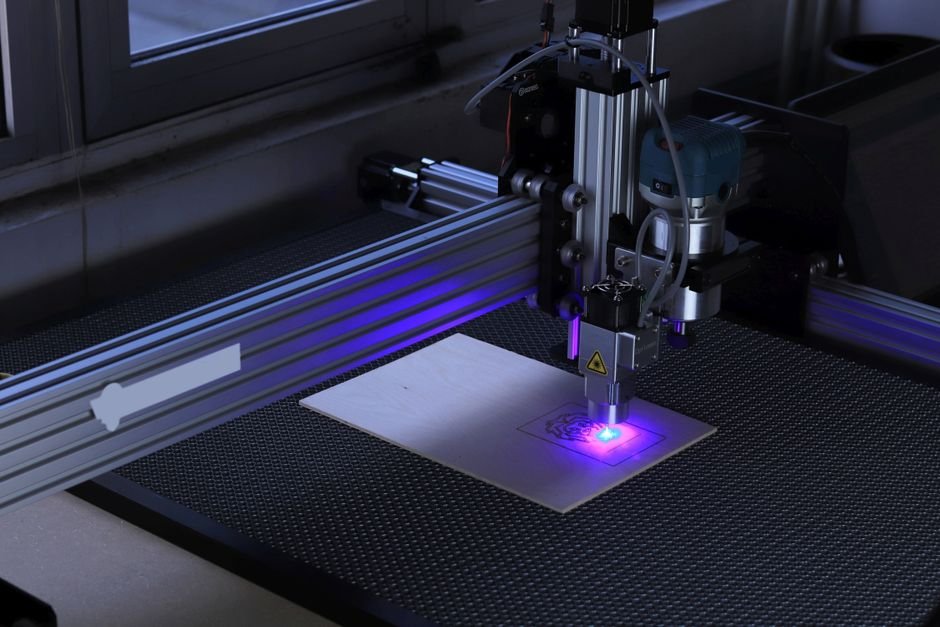
A diode laser engraver is a class of laser cutting and engraving machine that uses semiconductor diodes as its laser source. Unlike CO2 lasers that use gas tubes or fiber lasers that use doped optical fibers, diode lasers generate their beam directly from electrical current passing through a semiconductor junction. This makes them smaller, cheaper, and more energy-efficient than other laser types.
The central entity here is the affordable diode laser engraver. This is a sub-$1,000 machine designed for hobbyists, small businesses, and educational settings. These machines typically output between 5W and 40W of optical power. They operate at blue wavelengths (445-455nm) or, in newer models, at 460nm for better acrylic cutting.
How Diode Lasers Work (Semiconductor Physics for Hobbyists)
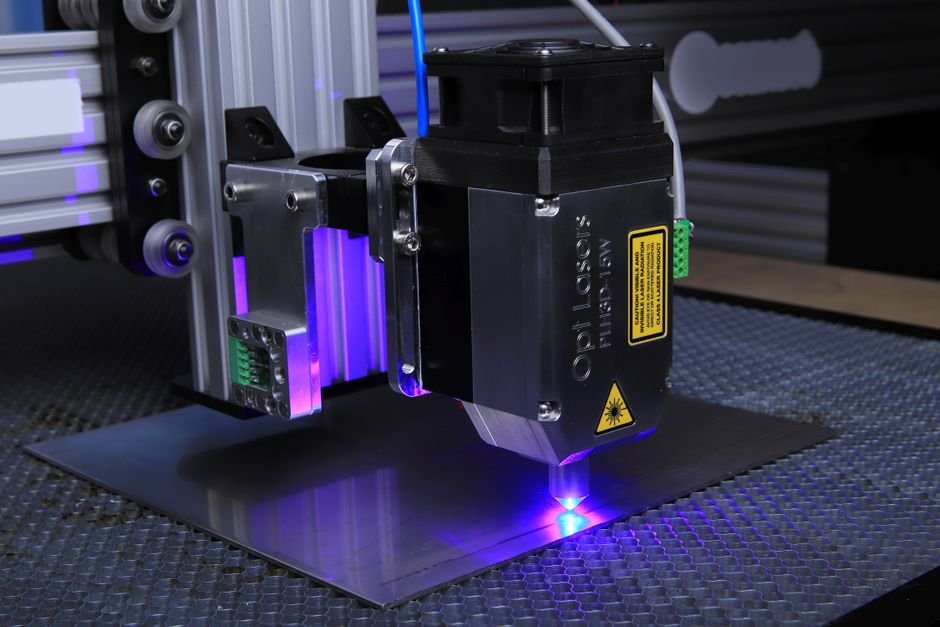
At its simplest, a diode laser works like an LED but with a much higher power density. When electricity flows through the semiconductor junction, electrons and holes recombine, releasing photons. A resonant cavity formed by reflective coatings on the diode’s facets amplifies this light into a coherent laser beam. The key difference from an LED is that the diode’s output is collimated — all the light travels in the same direction, which is what makes it a laser rather than just a bright light.
For hobbyists, the practical takeaway is this: diode lasers are instant-on. They need no warm-up like CO2 tubes. They are compact enough to fit in desktop machines. They are also relatively inexpensive to replace when they eventually degrade (typically after 8,000-10,000 hours of use). The trade-off is that their beam quality isn’t as good as CO2 or fiber lasers, which limits their cutting depth and speed.
Key Differences from CO2, Fiber, and UV Lasers
The affordable diode laser engraver occupies a specific niche in the laser ecosystem. Here’s how it compares:
- CO2 lasers (10,600nm wavelength): Excellent for cutting thick materials like wood up to 20mm, acrylic up to 10mm, and many plastics. They’re more expensive (starting around $2,000), larger, and require water cooling and periodic tube replacement.
- Fiber lasers (1,064nm): The gold standard for metal engraving. They can mark bare metals, including stainless steel, aluminum, and titanium. But they cost $3,000+ and have tiny engraving areas unless you spend significantly more.
- UV lasers (355nm): Used for ultra-precise marking on plastics, glass, and ceramics. Extremely expensive ($10,000+) and mostly industrial.
Diode lasers sit at the intersection of affordability and versatility. They can engrave most non-metallic materials and, with the right prep, some metals. They’re the best entry point for anyone wondering what is laser engraving and wanting to start without a large investment.
Laser Type Comparison Matrix: Diode vs CO2 vs Fiber vs UV
| Attribute | Diode Laser | CO2 Laser | Fiber Laser | UV Laser |
|---|---|---|---|---|
| Wavelength | 445-460nm (blue) | 10,600nm (infrared) | 1,064nm (near-infrared) | 355nm (ultraviolet) |
| Best Materials | Wood, leather, acrylic (<6mm), paper, fabric, stone (with prep) | Wood (up to 20mm), acrylic (up to 10mm), rubber, many plastics | Bare metals, plastics, ceramics | Plastics, glass, ceramics, thin metals |
| Cannot Engrave | Bare metal, clear glass, reflective surfaces | Bare metal (without coating), reflective surfaces | Thick wood, acrylic (poor absorption) | Thick materials, low throughput |
| Price Range (2026) | $150 – $900 | $2,000 – $8,000 | $3,000 – $15,000 | $10,000+ |
| Safety Class | Class 4 (dangerous to eyes/skin) | Class 4 | Class 4 | Class 4 |
| Typical Power | 5W – 40W optical | 40W – 150W | 20W – 100W | 3W – 15W |
| Running Cost | Low ($0.10/hr) | Medium ($0.50/hr + tube replacement) | Low ($0.20/hr) | High ($2/hr consumables) |
Decision Flowchart: ‘If You Want to Engrave X, Choose Y’
Here’s a practical decision framework based on your primary material:
- If you want to engrave wood, leather, or acrylic <6mm: Choose a diode laser engraver (20W+ optical power). It’s the most cost-effective option and handles these materials beautifully.
- If you want to cut thick wood (10-20mm) or acrylic (6-10mm): Choose a CO2 laser (60W+). Diode lasers simply don’t have the power or beam quality for these thicknesses.
- If you want to engrave bare metals: Choose a fiber laser (20W+). Diode lasers cannot engrave bare metals without marking sprays, and even then the results are inconsistent.
- If you want to mark plastics or glass with high precision: Choose a UV laser (if budget allows) or a diode laser with a marking spray for glass.
This laser type comparison makes it clear: the affordable diode laser engraver is the best choice for 80% of hobbyist projects. Only step up to CO2 or fiber if you consistently need capabilities that diode lasers don’t offer.
What Can an Affordable Diode Laser Engrave? (Material Compatibility)
Understanding material compatibility is critical before buying a diode laser engraving machine. Not all materials respond the same way to blue-wavelength light. Here’s a breakdown of what works, what works with preparation, and what simply won’t work.
Best Materials: Wood, Leather, Acrylic, Paper, Cardboard, Fabric
These materials absorb blue light efficiently, producing clean engravings and cuts:
- Wood: All types work well, from basswood and birch plywood to walnut and oak. Darker woods engrave faster because they absorb more light. For detailed work on wood, see our guide on the best laser engraver for wood.
- Leather: Both natural and synthetic leather engrave beautifully. Avoid chrome-tanned leathers, which can release toxic fumes.
- Acrylic (cast, not extruded): Cast acrylic (typically labeled as “laser-grade”) engraves white and cuts cleanly up to 6mm. Extruded acrylic melts rather than vaporizes, producing rough edges.
- Paper and Cardboard: Excellent for cutting and engraving. Low power settings work best to avoid burning.
- Fabric: Cotton, felt, and polyester blends engrave well. Avoid synthetic fabrics that can melt.
Possible with Prep: Anodized Aluminum, Coated Metals, Stone, Glass
These materials require additional steps but can produce good results:
- Anodized aluminum: The anodized coating absorbs the laser, leaving a white mark. This works well for black anodized parts.
- Coated metals: Metals with a powder coating or paint layer can be engraved by burning through the coating. The underlying metal shows through.
- Stone and slate: Diode lasers can etch stone by fracturing the surface. Results are lighter in color and less detailed than CO2 engravings.
- Glass: Requires a marking spray (like Cermark or LaserBond) that bonds to the glass surface. Without it, the laser passes through without effect.
What It Cannot Do: Clear Glass, Bare Metal, Reflective Surfaces, Thick Acrylic (>6mm)
Be honest about these limitations — they’re not failures of the technology, just physical constraints:
- Clear glass: Blue light passes through clear glass without absorption. You need a marking spray or a CO2 laser (which glass absorbs well).
- Bare metal: Polished metal reflects blue light. Even with marking sprays, results are inconsistent. For metal engraving, see best laser engraver for metal.
- Reflective surfaces: Mirrors, chrome, and polished stainless steel can reflect the beam back into the laser head, potentially damaging it.
- Thick acrylic (>6mm): Diode lasers lack the power and beam quality to cut thick acrylic cleanly. The edges will be rough and melted.
Galvo vs Gantry: The Motion System Decision You Must Make Before Buying
Before buying an affordable diode laser engraver, you need to understand the two motion systems: gantry and galvo. This single decision dramatically affects what your machine can do and how fast it works.
Gantry Systems (Most Budget Diode Lasers): Slower, Larger Area, Better for Cutting
A gantry laser engraver moves the laser head along X and Y axes using belts, rails, and stepper motors. This is the system used by virtually all budget diode lasers under $500. The laser head travels across the entire work area, which means:
- Advantages: Large work areas (typically 400x400mm to 600x600mm), ability to cut thick materials, simple construction that’s easy to maintain.
- Disadvantages: Slow engraving speeds (typically 200-600mm/s), the laser head moves physically, so precision is limited by belt tension and motor accuracy.
Gantry systems excel at cutting because the laser can dwell in one spot to burn through material. They’re also better for large-format projects like signs or furniture panels.
Galvo Systems (Emerging Budget Options): Faster Engraving, Smaller Field, No Cutting
A galvo laser engraver uses two mirrors mounted on galvanometers (high-speed motors) to steer the laser beam. The laser source itself stays stationary. This system offers:
- Advantages: Extremely fast engraving (up to 6,000mm/s), high precision (0.01mm resolution), ideal for batch production of small items.
- Disadvantages: Small work area (typically 100x100mm to 200x200mm), cannot cut thicker materials (no dwell time), higher cost for the same power.
Galvo systems are appearing in budget diode lasers for the first time in 2026. These machines are excellent for engraving small parts, jewelry, or serial numbers — but they cannot replace a gantry machine for cutting.
Which One Should You Choose? A Decision Framework Based on Your Primary Use Case
Here’s a simple decision framework:
- Choose a gantry laser if: You want to cut materials (wood, acrylic, leather), work on large projects (signs, panels), or need versatility. This is the right choice for 90% of first-time buyers.
- Choose a galvo laser if: You only engrave (never cut), need maximum speed for batch production, or engrave small items like jewelry, keychains, or electronics.
The diode laser motion system you choose determines your workflow. Most hobbyists should start with a gantry machine for its versatility. Add a galvo machine later if you need high-speed production.
Power Ratings: What Does ‘5W’ or ’20W’ Actually Mean?
Power ratings are the most confusing aspect of buying an affordable diode laser engraver. Manufacturers often inflate numbers, and the difference between optical and electrical power is critical to understand.
Optical Power vs. Electrical Power — The Marketing Inflation Problem
Here’s the reality: most budget diode lasers advertise their electrical input power rather than optical output power. A “40W” diode laser might only output 10W of optical power. The rest is lost as heat.
- Optical power: The actual laser energy hitting your material. This is what matters for engraving and cutting.
- Electrical power: The power drawn from the wall. Manufacturers use this number because it’s larger and sounds more impressive.
As a rule of thumb: divide the advertised wattage by 4 to estimate optical power. A “20W” machine likely outputs ~5W optical. A “40W” machine outputs ~10W optical. Reputable brands like XTool, Atomstack, and Sculpfun now list optical power clearly — look for this specification.
Real-World Performance Benchmarks for Common Materials
Based on testing with multiple machines, here’s what different optical powers can do:
- 5W optical (~20W advertised): Engraves wood at 300mm/s, cuts 3mm plywood in 3 passes, cuts 3mm acrylic in 5 passes. Good for thin materials and detailed engraving.
- 10W optical (~40W advertised): Engraves wood at 500mm/s, cuts 3mm plywood in 1 pass, cuts 6mm acrylic in 3 passes. The sweet spot for most hobbyists.
- 20W optical (~80W advertised): Engraves wood at 800mm/s, cuts 6mm plywood in 1 pass, cuts 10mm acrylic in 4 passes. Approaching CO2-level cutting for thin materials.
For a complete breakdown of power versus performance, see our laser engraver power guide.
Honest Limitations: What Affordable Diode Lasers Cannot Do
What They CAN Do (Realistically)
- Engrave wood, leather, acrylic (<6mm), paper, fabric, stone (with prep)
- Cut thin materials (3-6mm wood and acrylic)
- Produce detailed engravings at slow speeds (200-400mm/s)
- Run continuously for 8+ hours with proper cooling
- Work with LightBurn, LaserGRBL, and proprietary software
What They CANNOT Do (Honestly)
- No bare metal engraving: Without marking sprays, diode lasers cannot mark metal. Even with sprays, results are inconsistent.
- Slow cutting speeds: A 40W CO2 laser cuts 3mm plywood in one pass at 20mm/s. A 10W diode laser needs 3-4 passes at 5mm/s.
- Small engraving area: Most budget machines offer 400x400mm or smaller. Larger machines cost significantly more.
- Open-frame safety risks: All diode lasers are Class 4 devices. They can cause permanent eye damage instantly. Enclosures are essential.
These limitations aren’t dealbreakers — they’re just reality. If you need bare metal engraving, buy a fiber laser. If you need fast cutting, buy a CO2 laser. If you want an affordable entry point for 80% of hobbyist projects, a laser diode engraver is perfect.
How to Choose the Right Affordable Diode Laser Engraver
Choosing the right machine requires matching your needs to specific specifications. Here’s a decision framework to simplify the process.
Decision Framework: ‘If You Need X, Choose Y Because Z’
- If you need the best value for beginners: Choose the best diode laser engraver under $400 because it balances power, build quality, and software compatibility. The best diode laser engravers in this range include the XTool D1 Pro 10W and Atomstack A10 Pro.
- If you need maximum cutting power on a budget: Choose a 20W+ optical power machine ($500-800) because it cuts 6mm plywood in one pass. The best diode laser engraver for cutting is currently the Sculpfun S30 Ultra 33W.
- If you need a beginner-friendly machine: Choose the best laser engraver for beginners with built-in safety features and good documentation. The Gluwphy laser engraver is a strong contender here.
- If you need the best under $500: Choose the best laser engraver under 500 with at least 10W optical power and a 400x400mm work area. The Atomstack S10 Pro fits this perfectly.
Key Specs to Compare: Power, Area, Software, Safety Features
When comparing machines, focus on these five specifications:
- Optical power (not advertised power): Look for the actual laser output in watts. Divide advertised power by 4 if it’s unclear.
- Work area: 400x400mm is the minimum for most projects. 600x600mm gives you room to grow.
- Software compatibility: LightBurn support is essential. Some machines only work with proprietary software, which limits your options.
- Safety features: Look for limit switches, emergency stop buttons, and flame detection. An enclosure is highly recommended.
- Build quality: Aluminum frames are better than acrylic. Linear rails are better than V-slot wheels.
Budget Tiers: Under $300, $300–$600, $600–$900
- Under $300: Entry-level machines with 5W optical power, 400x400mm work area, and basic build quality. Good for learning but limited in capability. Expect to upgrade within a year.
- $300–$600: The sweet spot for most buyers. You get 10W optical power, better build quality (aluminum frames, linear rails), and LightBurn compatibility. Machines in this range include the XTool D1 Pro and Atomstack S10 Pro.
- $600–$900: High-end budget machines with 20W+ optical power, larger work areas (600x600mm), and advanced features like dual lasers or built-in air assist. These can cut 6mm plywood in one pass.
Essential Accessories for Your Diode Laser Engraver
To get the most from your diode laser engraving machine, invest in these accessories. They’re not optional — they directly affect your results and safety.
Air Assist (Why You Need It)
Laser engraver air assist is the single most important upgrade you can make. A small air compressor or aquarium pump blows compressed air across the cutting surface, which:
- Clears smoke and debris from the laser path (prevents burning)
- Cools the material surface (reduces heat-affected zones)
- Blows away flammable gases (reduces fire risk)
- Improves cut quality dramatically (cleaner edges, less charring)
Most budget machines don’t include air assist. You can add a basic setup for under $30 using an aquarium pump and tubing. For a full guide, see laser engraver air assist.
Honeycomb Workbed and Rotary Attachment
A honeycomb workbed supports your material while allowing smoke and debris to fall through. It prevents burn marks on the underside of your work and improves cut quality. Most machines come with a basic honeycomb bed, but upgrading to a larger or sturdier one helps.
A rotary attachment lets you engrave cylindrical objects like cups, bottles, and diode laser engraving golf ball surfaces. These attachments cost $50-150 and are essential if you plan to sell engraved drinkware.
Enclosure and Exhaust Systems
Diode lasers are Class 4 devices — they can cause permanent eye damage from reflected beams. An enclosure with laser-safe acrylic windows is essential. Many budget machines now offer enclosures as add-ons ($100-200).
An exhaust system (inline fan + ducting) vents smoke and fumes outside. Even if you’re just engraving wood, the smoke contains fine particulate matter that’s harmful to breathe. A 4-inch inline fan with carbon filter is the minimum recommendation.
Safety Glasses (OD 6+ for Blue/Violet Wavelengths)
You need OD 6+ (optical density 6 or higher) safety glasses specifically for 445-460nm wavelengths. Regular laser safety glasses for CO2 lasers (10,600nm) won’t protect you. Many budget machines come with cheap glasses that don’t meet safety standards — replace them immediately.
For a complete list of upgrades, see our laser engraver accessories guide.
Frequently Asked Questions About Affordable Diode Laser Engravers
Can a diode laser engraver cut through metal?
No. Diode lasers cannot cut through metal. They can mark coated metals (like anodized aluminum) and metals treated with marking sprays, but they lack the power to cut any metal thickness. For metal cutting, you need a fiber laser or a CO2 laser with specialized optics.
What software do I need for a diode laser engraver?
LightBurn is the industry standard and supports most diode lasers. It costs $60 for a license but is worth every penny for its advanced features. LaserGRBL is a free alternative that works with many budget machines. Some manufacturers also provide proprietary software, but these are generally less capable.
Can I engrave glass with a diode laser?
Yes, but only with a marking spray like Cermark or LaserBond. The spray creates a layer that absorbs the laser and bonds to the glass. Without it, the laser passes through clear glass without effect. The results are not as sharp as CO2 engravings on glass.
How long do diode lasers last?
Diode laser modules typically last 8,000-10,000 hours of operation before their output drops significantly. Replacement modules cost $50-200 depending on power. This is much longer than CO2 tubes (which last 2,000-5,000 hours) and cheaper to replace.
Can I use a diode laser for laser engraved barcodes?
Yes, if the barcode is on a compatible material like wood, leather, or coated metal. Diode lasers can produce high-contrast marks suitable for barcodes, QR codes, and serial numbers. The laser engraved barcodes guide covers optimal settings for readable results.
What’s the best diode laser engraver for a small business?
For a small business, invest in the $600-900 tier for reliability and speed. The XTool D1 Pro 20W and Sculpfun S30 Ultra 33W are top choices. They offer the cutting power for production work and the build quality for daily use. For local service, check laser engraving orlando for nearby providers.
Final Verdict
The affordable diode laser engraver market in 2026 offers incredible value. For under $500, you can own a machine that engraves wood, leather, acrylic, and dozens of other materials with professional-quality results. The key is understanding what these machines can and cannot do, and choosing the right motion system and power level for your specific needs.
Start with a gantry machine in the $300-600 range with 10W optical power. Add air assist and an enclosure immediately. Learn LightBurn. Master the basics on wood and leather before exploring advanced materials. Within six months, you’ll have the skills to start a small engraving business or produce gifts that look like they cost ten times more than the machine.
The best diode laser engraver for you is the one that matches your primary use case, budget, and willingness to learn. Don’t overbuy — a 10W machine will handle 90% of hobbyist projects. Don’t underbuy — avoid the sub-$200 machines that frustrate more than they teach. Find the sweet spot, and you’ll wonder why you didn’t buy one years ago.